No Products in the Cart
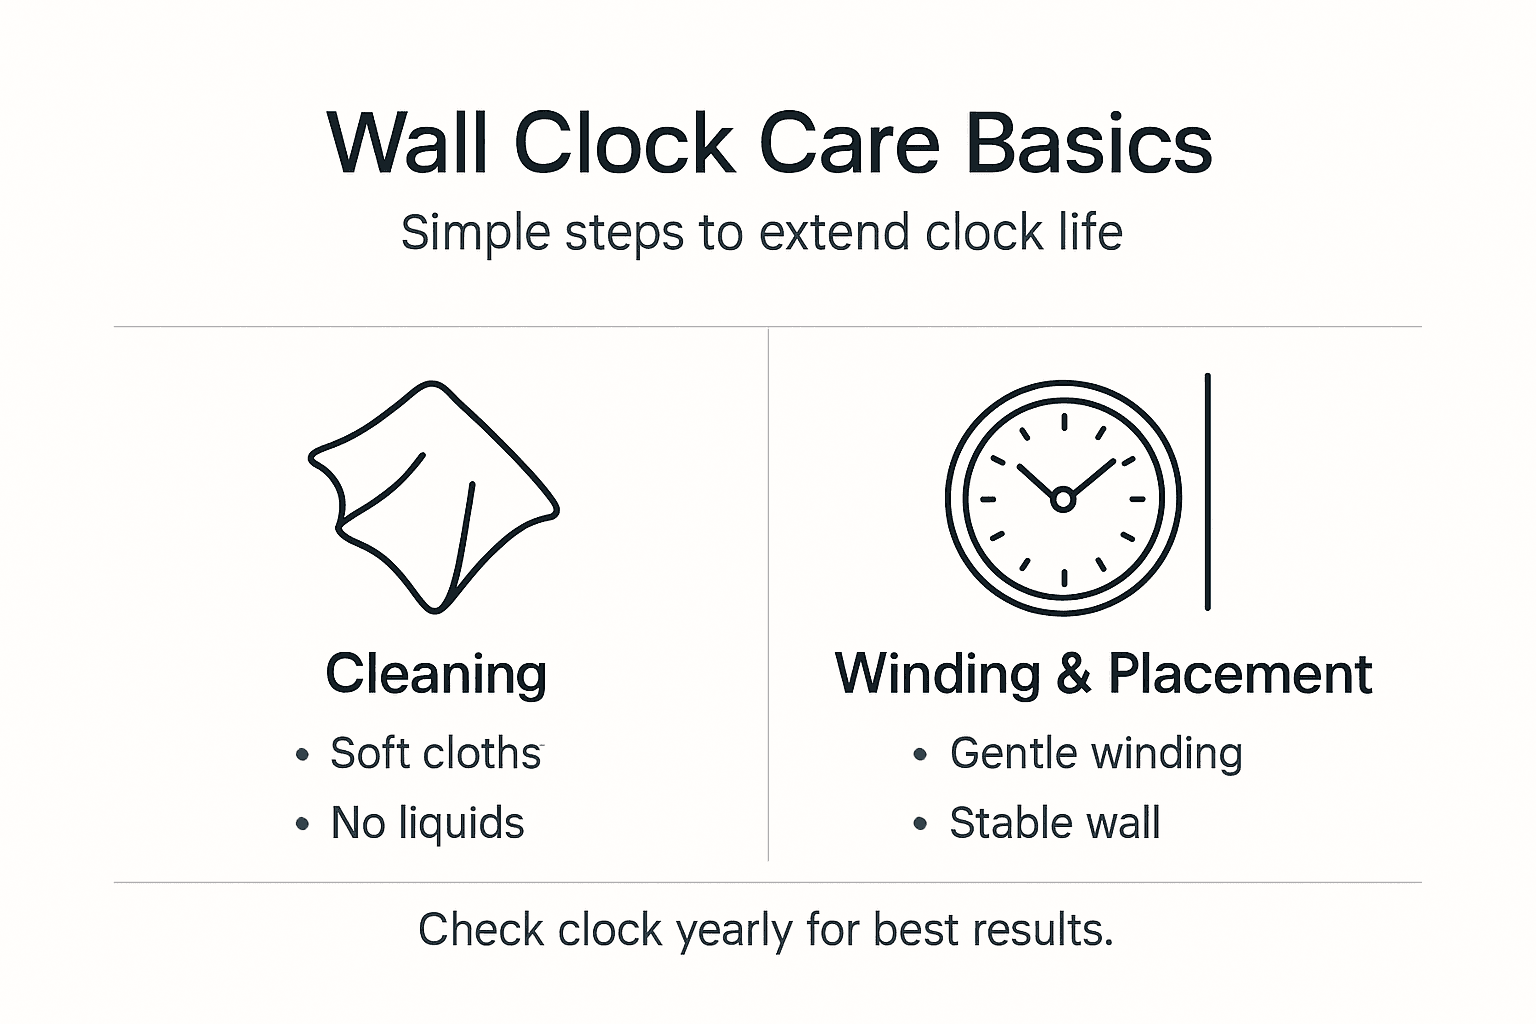
Many clock owners mistakenly believe that winding their clocks tighter enhances accuracy. This misconception can cause serious damage to delicate mechanisms. Over-winding can cause friction that may stop the clock entirely, so winding should stop smoothly without sudden force. Proper maintenance supports accuracy and longevity through careful cleaning, winding, lubrication, placement and professional servicing. This guide is written for UK homeowners and small business owners who want practical ways to keep wall clocks running reliably for years.
| Point | Details |
|---|---|
| Regular gentle winding prevents damage and maintains accuracy | Wind at consistent times without forcing the mechanism |
| Weekly dusting and periodic wax polishing preserve clock condition | Use lint-free cloths and beeswax polish every 2–3 months |
| Lubricate mechanical parts every 3–5 years to reduce wear | Apply clock-specific oil sparingly to pivots and bearings |
| Place clocks away from sunlight, humidity and heat for longevity | Environmental factors directly impact accuracy and lifespan |
| Seek professional servicing every 10 years for complex upkeep | Expert maintenance prevents major wear and costly repairs |
Wall clocks generally fall into three types: mechanical, pendulum and quartz. Mechanical clocks use spring-driven movements that require regular winding. Pendulum clocks rely on weighted swings to regulate time. Quartz clocks run on batteries with electronic oscillators.
Each type needs a different maintenance approach that affects accuracy. Neglect can cause wear, time drift and a shortened lifespan. Regular care preserves functional precision and appearance.
Core maintenance tasks include:
Understanding your clock type helps you apply appropriate care and avoid mistakes that accelerate deterioration. A well-maintained clock can remain reliable for decades.
Before you begin, gather the correct tools. Soft lint-free cloths help prevent scratches. Use the correct winding key that matches your clock’s arbor size and shape. For mechanical clocks, use clock-specific oil (not general household lubricants) to protect delicate parts.
Identify your clock type and winding mechanism to avoid damage. Check manufacturer notes if available and confirm whether your clock needs daily or weekly winding. Note any extra features such as chime/strike mechanisms.
Set up a stable, well-lit workspace:
| Item | Purpose | Frequency of Use |
|---|---|---|
| Lint-free cloths | Dusting and cleaning surfaces | Weekly |
| Beeswax polish | Protecting wooden cases | Every 2–3 months |
| Winding key | Operating spring mechanisms | Daily or weekly |
| Clock oil | Lubricating pivots and bearings | Every 3–5 years |
Proper preparation makes maintenance safer and more effective. Using the right tools and working carefully reduces the risk of costly damage.
Dust build-up can slow mechanisms and affect appearance. Regular dusting with a soft cloth helps prevent dust entering the movement. Dust weekly where possible.
Avoid applying liquids directly to cases. Moisture can damage wood finishes and corrode metal components. For stubborn marks, use a barely damp cloth and dry immediately.
Wooden cases may benefit from beeswax polish every 2–3 months. Apply thin, even coats. Avoid silicone-based products that can create build-up and attract dust.
Suggested cleaning routine:
Tip: Keep a small cleaning kit nearby so regular maintenance is simple and consistent.
Proper winding technique protects the movement and supports accurate timekeeping. Winding should be done gently and at consistent times. Excessive force can cause spring breakage or gear wear.
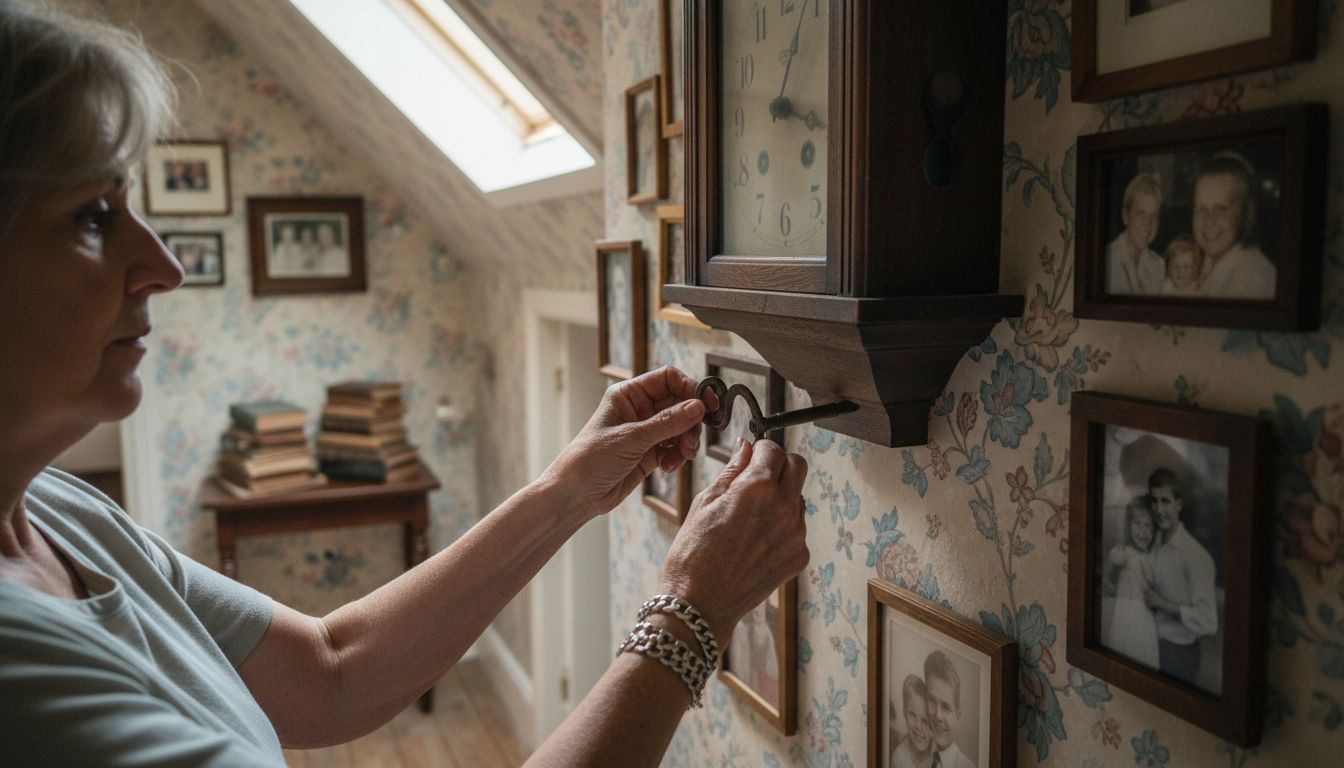
Wind spring-driven clocks with smooth, steady pressure. Never force the key past the natural stopping point. You should feel resistance increase gradually as the spring tensions.
Step-by-step winding:
Winding frequency varies. Wind 30-hour clocks daily at the same time, and wind 8-day clocks weekly on the same day. Consistency helps prevent the clock running down fully, which can stress the mechanism.
Quartz wall clocks do not require winding, but they do need battery replacement. When changing batteries, check polarity and clean contacts with a dry cloth to reduce oxidation. For easy-care options, consider quartz wall clocks.
Tip: Set a reminder for winding day to reduce missed windings and unnecessary resetting.
Mechanical clocks need periodic lubrication. Moving parts create friction that increases wear without proper oil. Lubricate pivots and bearings approximately every 3–5 years using clock-specific oil.
Use oil formulated for clock movements only. General household oils can gum up mechanisms. Apply sparingly to the correct pivot points and bearing surfaces.
Avoid common lubrication errors:
If you are not confident working with movements, professional lubrication is recommended. Incorrect application can cause more harm than good.
Environment affects accuracy and longevity. Avoid direct sunlight, high humidity and heat sources (radiators, fireplaces) to reduce warping, corrosion and time drift.
Choose locations with:
For higher-humidity areas, consider models designed for visibility and resilience, such as radio controlled wall clocks with temperature and humidity display.
| Environment | Temperature | Humidity | Clock Impact |
|---|---|---|---|
| Ideal | 18–22°C stable | 40–50% | Best accuracy and preservation |
| Acceptable | 15–25°C minor variation | 35–60% | Minimal impact with monitoring |
| Poor | Above 25°C or frequent swings | Above 60% or below 30% | Accelerated wear and time drift |
Mount the clock securely and ensure it hangs level, especially for pendulum clocks. For large display options, see large radio controlled wall clocks.
Relocating clocks requires care. Movements designed for stationary use can be damaged during transport. Supporting or securing the pendulum helps protect internal parts.
Before moving a clock:
Carry clocks upright where possible and support from underneath. After reinstalling, ensure the clock is level and restart the pendulum gently.
For secure mounting options, consider robust designs such as radio controlled wall clocks with durable cases.
Even well-maintained clocks can develop issues. Early correction prevents minor faults becoming major repairs. Hands touching or misaligned can stop movement; adjusting hands so they are parallel can restore clearance.
Monthly checks:
If problems persist after basic checks, seek professional support. Avoid complex DIY repairs that can cause irreversible damage.
Mechanical clocks benefit from periodic professional servicing beyond routine home maintenance. A full service roughly every 10 years can reduce wear and maintain accuracy.
A typical service includes:
| Service Type | DIY Capability | Professional Required |
|---|---|---|
| Dusting and basic cleaning | Yes | No |
| Regular winding and adjustment | Yes | No |
| Hand alignment and tightening | Yes (with care) | If damaged |
| Movement lubrication | Possible (risk) | Recommended |
| Mainspring replacement | No | Yes |
| Gear repair or replacement | No | Yes |
If you own valuable, antique or complex chiming clocks, establishing a relationship with a qualified horologist helps ensure safe, correct repairs when needed.
Consistent maintenance improves performance and longevity. Well-cared-for clocks often maintain accuracy within about a minute per week, which is suitable for most homes and workplaces.
Long-term benefits include:
Preventive care reduces the chain reaction of dried oil, increased friction and component wear that leads to expensive repairs. Well-maintained clocks also preserve sentimental and resale value.
If you prefer low-maintenance timekeeping, consider clocks designed for reliability and ease of care. Youshiko offers premium radio controlled wall clocks that synchronise with the UK atomic time signal, reducing manual adjustments. These auto time setting clocks help maintain accurate time with minimal effort.
You can also combine timekeeping with home monitoring using weather stations that track indoor comfort and environmental conditions. Explore the full range in our home weather monitoring guide.
Wind 30-hour clocks daily at the same time. Wind 8-day clocks once weekly on the same day and time. Consistent winding helps prevent run-down and reduces stress on components.
Dust weekly with a soft lint-free cloth. Do not apply liquids directly. For wooden cases, apply beeswax polish every 2–3 months and avoid silicone-based products. Gentle, frequent cleaning is safer than intensive cleaning.
For mechanical clocks, professional servicing is recommended around every 10 years, or sooner if you notice unusual sounds, loss of accuracy or failure to start despite correct winding.
No. Household oils can damage clock movements. Use clock-specific oil only, applied sparingly every 3–5 years to pivots and bearings, or have a professional perform lubrication.
Avoid direct sunlight, bathrooms and other high-humidity areas, and locations near heat sources such as radiators or fireplaces. Stable, indoor environments support accuracy and long-term reliability.